Social Icons

Featured Posts

Monday, November 14, 2016

3 Methods For Turning Your Computer Into A CCTV Camera

I’ve always wondered whether my computer could make it possible for me to view what’s going on at home when I’m not there. I assumed that having that ability would entail installing a fancy and expensive CCTV system, but I realized that wasn’t necessary when I came across these three incredibly simple ways of harnessing the capabilities of computer and laptop in combination. Here they are: 


What you need 
  • A computer or laptop
  • A good internet connection 
  • Skype installed on your computer for Method 1 
  • The latest version of Google Chrome and a Gmail email account for Method 3 
  • A smartphone or computer that you can use remotely 

1. Use Skype

- If you don’t have the video chat and voice calling application, Skype, installed on your computer, make sure you install it. If you have Windows 8 or newer as an operating system installed on your computer, then you will not need to install it.

- Log in to your primary Skype account. If you don’t have one, follow the simple steps to register.

- Press "Windows key- C," click "Settings" and then "Options." Select "Calls."

- Under the Calls option, you will see two sliders. These sliders are for instructing Skype to answer calls automatically and to turn on video automatically.

- Next, you’ll need a secondary Skype account. If you don’t have one, try creating one in your spouse’s name and using their email address.

- Add your spouse’s account as a Skype contact to your own account.

- Get your spouse to log in to his or her account from a remote smartphone or computer. Click the video camera icon to call your computer. It will respond automatically and begin to send you a video feed from your home.
 
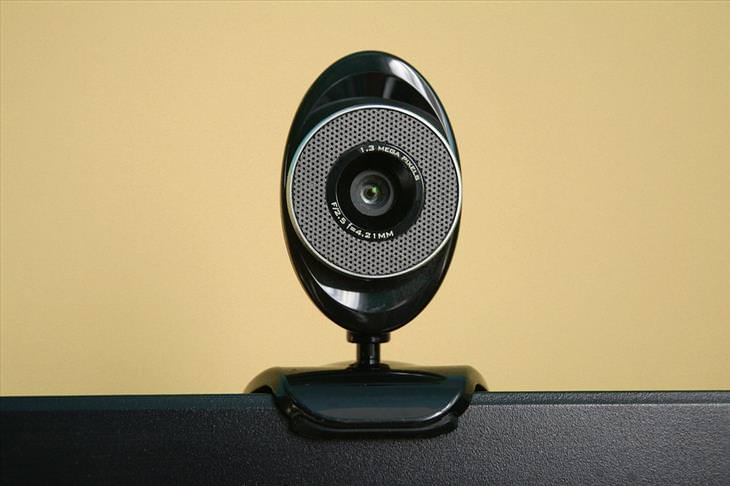
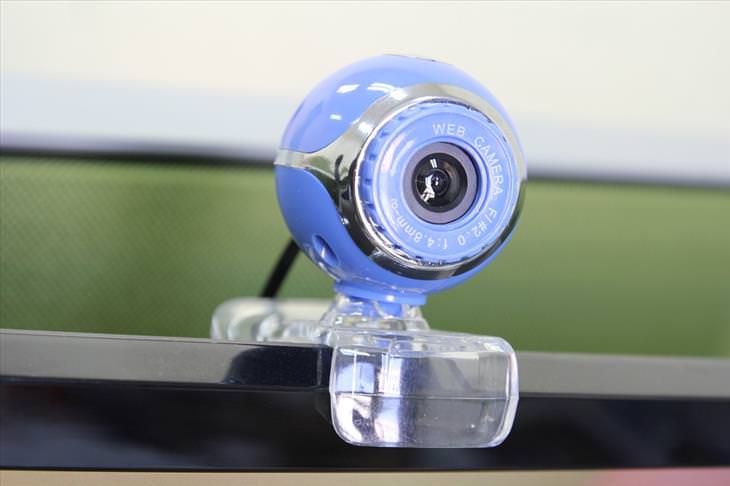
2. Use My Webcam Monitor

- My Webcam Monitor is a free piece of software that you can get here.

- Install it on your computer, open the software and click Register. Type in a username, password and email address and click Register once again.

- Next, click OK, followed by Sign In.

- Click Next and then enter the name you want to call your webcam broadcast.

- Click Next.

- Select your computer’s webcam from the drop-down menu, and click Next.

- Click Finish.

- Next, install My Webcam Monitor on the computer, smartphone or tablet you’re going to be using.

- Sign in to the remote computer, smartphone or tablet with your username and password to see your webcam. Select it and begin viewing a live stream.


3. Use Google Chrome Remote Desktop App

- Open Google Chrome on your home computer.

- Navigate to the Chrome Remote Desktop App by clicking on Resources, then Free.

- After you’ve installed the app, click on Launch App. Sign in to your Google Mail account when prompted. Click Continue, followed by Accept.

- Click Get Started under My Computers.

- Click Enable Remote Connections.

- Enter your security PIN, then click OK.

- Install the app on the remote computer you will be using. Sign in with your Google username and password, just like you did at home.

- Click on the listing that represents your home computer, then enter your PIN to access Google Chrome on your home computer.

- Go to www.webcamtoy.com. Start your home computer’s webcam through the site, and choose to view a live stream to begin seeing what’s going on at home.

Wednesday, July 8, 2015

Software and Drivers Packege for HP LaserJet 2300 Printer

Description
The HP LaserJet 2300 printer driver package will work under most Windows systems. It installs the printer driver version 60.5.30.01 onto your system and the complete HP 2300 series Printing System. The driver package can be used for any 2300 series printer: HP LaserJet 2300, 2300d, 2300l, 2300n, 2300dn and 2300dtn. It includes:

  • HP LaserJet 2300 PCL 6 driver. Best option for printing. The PCL 6 printer driver provides the best overall performance and What You See Is What You Get (WYSIWYG) printing.
  • HP LaserJet 2300 PS driver. Use the PS printer driver to print and to gain access to the PostScript level 3 features of your printer.
  • HP LaserJet 2300 PCL 5e driver.

Click Download to download the latest version of any driver now

Wednesday, May 13, 2015

How to Fix Vertical Lines on Laptop / Computer Screen


Vertical lines appearing on LCD screen is very common. Whether the screen belongs to a laptop computer or desktop PC, mobile phone, or even a television, the fault is usually due to the ribbon cable and its connections.
A faulty ribbon cable can cause all sorts of havoc manifesting in bright vertical lines. Sometimes they can becoloured lines such as blue, green, grey, black, and red. The lines can appear thick or thin and on just one-half of the screen. Sometimes the fault will manifest as two vertical white lines. You can even get horizontal lines as well.
If you have lines appearing on the LCD screen, then the first simple thing to check is the seating of the ribbon cable that connects the display panel to the motherboard. Most of the time, the fault is with the poor connection made by the ribbon cable.
What causes lines?
One of the most common problems with ribbon cables is oxidation of the contacts. It can happen either on the ribbon cable contacts or on the socket contacts. Manufacturers often use a mix of gold and copper for the electrical contacts, however, if they have not used enough gold, then oxidation occurs over time. This results in a working television or laptop screen suddenly exhibiting lines.
The solution is of course very simple, one needs to clean the contacts with a high quality electrical contact cleaner. It is best to clean the socket and the ribbon cable contacts, which will solve the fault.

Cracked Ribbon Cable
One of the most common faults with laptops is that the ribbon cable connecting to the LCD panel cracks. It typically fails near the hinge area due to flexing in that region, and over time, some of the tracks on the plastic cable breaks. I have seen these types of faults on many laptops. It does not matter whether it is a Lenovo, IBM, Acer, Samsung, Toshiba, or even a MacBook Pro!


Dislodged Cable
It is also possible to have a dislodged cable, which typically occurs on mishandled laptops. The plastic clip that holds the ribbon cable is very small and delicate and if the laptop receives an impact, the ribbon cable can dislodge.
This type of fault can also occur on LCD televisions; however, it tends to be on new units, where the box has received an impact during transit from the factory.
In this situation, the repair can be easy, as the cable will simply require reseating. However, there is still the labour time to consider as it can take the best part of the day to gain access to the ribbon cable.
Troubleshooting
If the laptop has a socket that provides a VGA output, then the first thing to do is to hook up another good monitor to it to see if the picture is good. If the picture on another monitor is good, then you can be sure that thevideo chipset and the motherboard electronics are operating properly, and it is a connection issue.
I used this same method of troubleshooting to repair an LCD television recently. Modern televisions have a video out socket, and if you feed the signal from that to another monitor, you can check for the quality of the video display. If the external monitor does not show lines, then you know for sure that it is a connection issue. Hence, this method of troubleshooting works for some of the modern televisions as well.

Repairing a Laptop
When half of the vertical interlace is missing showing a picture that is broken up vertically, the display appears with vertical lines. This is usually due to a cracked ribbon cable.
Generally, for laptops a replacement cable is always required due to it breaking near the hinge. I had this Dell laptop and replacing the LCD ribbon cable solved the problem. I managed to buy a replacement from Dell for a modest price £6.00. The laptop was just outside the warranty period; however, they still shipped out the cable free of charge. This is the reason why people buy Dell. In my experience Dell tend to stand by their customers and products, and their prices for replacement parts are realistic and down to earth.
Replacing a laptop ribbon cable is simple, and the top-half of the laptop, and keyboard needs removing to gain access to the socket on the motherboard side. As you can see, it flexes near the hinge area and breaks where the ribbon cable wraps around the hinge.

Monday, April 27, 2015

How to Install Android Gingerbread Nitdroid on Nokia N900


Android Gingerbread is available to upgrade your Nokia N900 that have the Maemo 5 Operating System. AndroidGingerbread 2.3.4 is possible to install on nokia N900 and replace the old Maemo 5 OS. You can install Android Gingerbread 2.3.4 with the use of N12 UMay.
N12 is features with, Android 2.3.4 Gingerbread, Gapps(20110503), Advanced than N11 VOSTOK, Pro active USSD Sessions, Able to receive and send Messages, IMEISV, 3G – Fast Dormancy, DHCP/Wi-Fi – Problem Fixed.


Things You’ll 
1. Nitdroid Gingerbread N12 UMay – Download                                 
2.Nitdroid Kernel - Download

Instructions

1.Insert Micro SD card in Nokia N900 and connect with Internet via Wifi or Network Mode.
2.Allow repositories in Application Manager (Extras, Extras-testing, Extras-devel, Default Nokia)
3.Install rootsh and Leafpad from Application Manager.
4.Open X-terminal and type
              root
         apt-get update
         apt-get install nitdroid-installer

         y
         y
 After the Package was installed close X-terminal.

5.Now transfer the downloaded file Nitdroid Gingerbread N12 UMay to /home/user/MyDocs.
6.After that, copy the downloaded file Nitdroid Kernel to /home/user/MyDocs.
7.Open Terminal and type:

               root
          cd /home/user/MyDocs
          bzip2 -d N12_UMay.tar.bz2
          cd /home
          mkdir /and
          cd /
          mount /home /and
          cd /and
          tar xvf /home/user/MyDocs/N12_UMay.tar
          dpkg -i /home/user/MyDocs/nitdroid-kernel-2.6.28-07_rc4_armel.deb

          leafpad /etc/multiboot.d/11-NITDroid-mmcblk0p2-2.6.28.NIT

    Press tab and Enter for open it in Leafpad.

8.Open your .item file and search for ITEM_DEVICE

         If you use MMC, change it to ITEM_DEVICE=${INT_CARD}p2
         If you don’t use MMC, change it to ITEM_DEVICE=mmcblk0p2
Save it.

9.Switch off and after a few seconds, Switch it on. During on that, it will ask you to choose OS option, Meamo and Nitroid. Select Nitroid now you successfully installed Andrroid 2.3.4 on your Nokia N900.

Friday, November 28, 2014

Make your computer to be a Wi-fi Hotspot by using My WiFi Router v1.01.

My W-FI Router is a virtual WiFi router tool which can converts your PC/Laptop into a WiFi Hotspot. This can be used to share the Internet on your computer with multiple device. You can also share files and folders with the devices which are connected to your network..

 Key features:

Easy to create a secure and customizable wifi hotspot
Just 3 steps: Install My wifi router -> Set your own hotspot name and passwords –> Start, now you have converted your windows XP, 7 & 8 laptop into a virtual wifi router and creates a secure wifi hotspot.
Share Internet Connections
You can share single internet connection(LAN, Ethernet, Data-Card, 3G/4G, Wifi) for multiple devices like laptops, smartphones, android phones,PDAs, Ipads.
Display and Manage Connected Devices
You can see the details of the connected device(Name, Ip Address, Mac Address), and also manage which device have the access to the virtual hotspot.
Auto & Manual Internet Selection
Automatically configure your hotspot’s Internet sharing settings or you can configure the internet manually.
Extends your Wifi range
Extend the range of your home or office Wi-Fi with just a few clicks.

Installation:

1- Extract archive with WinRAR or 7Zip.
2- Install the program .
3- Enjoy this software.
http://www.mywifirouter.me/files/MyWIFIRouter_setup.exe

Monday, November 17, 2014

How to Troubleshooting Black Screen Displays with No Error Messages During Start-up or Boot

There are many reasons that a computer does not startup or boot into the Windows operating system. If your computer will not start or boot, you will see or hear symptoms to indicate the general area of the problem. If you are not sure what the problem is:

Computer Does not Start (Windows 7, Vista, XP) 
This document lists the symptoms you see if the computer does not start, provides an overview of the complete troubleshooting process, and links to other documents with step-by-step details to restore the computer to proper operation. If your computer does not startup or boot into Windows, use this document to troubleshoot and correct the problem.

DO THIS FIRST - Perform a hard resetIf the computer suddenly fails to startup properly, perform a hard reset as the first action. Performing the hard reset will correct many problems. If the computer still does not start properly, select your symptom from the list below to guide you to the recommended corrective actions.
  1. Disconnect all peripheral devices and remove all USB devices and SD media cards.
  2. Disconnect the AC power adapter, remove the battery, and then press and hold the power button for at least 15 seconds to drain all residual power and restore default startup settings.
  3. Reconnect the AC power adapter (but do not insert the battery), press the Power button, look for glowing lights near the caps lock and num lock keys, and listen for sounds of a fan or other moving parts turning.If the computer starts normally after performing a hard reset, you are done troubleshooting. Otherwise select the symptom below that best describes your issue and perform the troubleshooting steps provided.

FIX A BLACK SCREEN DISPLAY:


DO THIS FIRST - Perform a hard reset
If a PC suddenly fails to boot properly, you should perform a hard reset as the first procedure.
Disconnect all peripheral devices and remove all USB devices and media cards. You want to test the computer not the accessories!
Disconnect the AC power adapter, remove the battery, and then press and hold the power button for at least 15 seconds.
Reconnect the AC power adapter (but do not connect the battery), Press the Power button,Look for glowing LEDs near caps lock and num lock keys, and Listen for sounds of a disk drive and fan turning.

Actions to take after performing hard reset

If no error message is displayed:
  • Connect an external monitor to test the display
  • Test for memory module problems
  • Test the hard drive
  • Contact manufactures(HP, DELL,TOSHIBA, etc) for technical assistance
If the display remains blank (black screen or white screen) after doing a hard reset, temporarily connect an external monitor to test the notebook's display. If an image displays on the external monitor, continue to perform the tests, install drivers, and make adjustments as described in the next section.

FOR ANOTHER ALTERNATIVE YOU CAN USE THIS SIMPLE METHOD:

1. UNPLUG THE POWER 
2. REMOVE BATTERY 
3. HOLD POWER BUTTON FOR 30/60 SECONDS 
4. REATTACH POWER AND START THE LAPTOP 
5. SHUT BACK DOWN 
6. PUT IN THE BATTERY 
7. THATS IT 

NOTE THAT:-
If these steps solve the problem, you're done. If not, try repeating the steps and selecting an older restore point (if one is available). If that still doesn't solve the problem, contact your computer manufacturer or technical support for further assistance.


.......THANK YOU FOR YOUR COOPERATION AND GOD BLESS YOU.....


Saturday, October 11, 2014

How to connect Android Phone to your Webcam and Download software Application:

Webcam on Android

Connecting your Android phone with a web camera is not a very tough thing to do. You may ask why should I do so? Only for fun?
No dear sir/madam/kid… it is not only for fun (though it would be fun indeed!) it is also for the sake of security. You can create your own IP camera system in this way.
You can check and watch your home through your Android phone while you are outside. Yes you can use the webcam remotely.
Like a PC you shall be able to connect with the webcam with your Android and there are apps for it.

Difficulty: Moderate
Requirements:
1) An Android Smartphone.
2) A Webcam
3) A PC or Laptop
4) Webcam to IP cam converter application for PC
5) An Android IP camera connector app.

What is an IP Camera?
To some of you, I know, this term “IP camera” is not very well known. You may wonder what I mean by Webcam to IP camera converter.
An IP camera is nothing but a remote, online camera. A camera connected to a home network or internet and can be accessed remotely. This type of camera system is costly and used for high security.
Convert Your Webcam into an IP camera
You need some kind of software to do so in your PC .These applications are not very scarce. There are many good free IP camera applications too.

You may try Vitamin D, HomeCamera, WebcamXP or YawCam.

The free version of Vitamin D lets you to connect with a single Webcam. It has an email alert system if it notices some suspicious movement.
Homecamera lets you connect to four webcams. Motion detection email is also available.
WebcamXP not only connects to eight webcams but also support remote panning or titling of your webcams, if supported.
YawCam is free and simple.
Download any of the above mentioned to your PC.
Open the application and follow the steps required to connect your webcam to network. Don’t worry the task is not too tough. Instructions are available.
After that, from the Application write down the IP Address of your camera feed. It would be inside the Settings of the application.
If you want my advice then I shall recommend YawCam, because it is too easy to setup.

How to Use Yawcam : Video Tutorial


Open Your Webcam on Your Mobile
Now, we are in the main stage. You need an app to connect your IP camera with your Android mobile phone.
There are many apps in Google Play store but most of them are not free.
IP Cam Viewer Light is a very good free IP camera feed viewer.
TinyCam Monitor Free is another free alternative.
I recommend you to use TinyCam Monitor Free. Why?
It is because this app has native support for YawCam.
If you don't like jump the next eBay section to read more.
How to Setup TinyCam Monitor?
Download and install the app in your mobile.
Open the app and click Manage Cams.
Then select Add Camera.
If you use YawCam then choose YawCam as your camera vendor. Now you are ready.
Congratulations, you have done it. You have successfully connected your webcam to your Android Mobile.
http://www.eyespyfx.com/win/2.0/broadcaster_win.zip

Friday, June 6, 2014

Five Common Computer Problems and their Solutions


You're working away at your computer when suddenly, up comes an error message – or worse, your computer comes to a screeching halt. Deciphering what computer problemsyou have and how to fix them can be difficult, especially if you don't know as much as you'd like about your PC. Here are five common computer problems that system repair softwarecan help you fix.

Blue Screen of Death (BSoD)

Many people think of blue as a calming color; however, when it comes up on your computer screen with a bunch of white text, it probably has the opposite effect. The blue screen of death (BSoD or STOP Error) may appear to be one of the scariest computer problems you'll come across. However, all your computer may need is for you to reboot it. This STOP error appears on your screen for a variety of reasons: failing hardware, damaged software, corrupt DLL files, problems with drivers and more. The remedy for a blue screen of death depends on the original problem. The screen provides you with codes that can help you identify and fix your computer problems.

                                                         Missing DLL File

Dynamic-Link Library (DLL) files house information for your operating system on how to perform certain functions. Occasionally, your computer loses DLL files or something damages them. When your PC can't read the particular DLL file, it doesn't know how to respond in certain situations. You may have a missing or corrupt DLL file if you receive an error message every time you perform a certain function, such as saving. If your computer problems are stemming from missing and damaged DLL files, you can restore them by downloading them back onto your PC.

Applications That Won't Install

If you're having trouble with an application not installing, it may be because your computer doesn't have enough hard drive space. If this is the case, you need to free up some space. This is one of the computer problems that's, well, least problematic. You can free up some hard drive space by getting rid of files and folders you don't need. These may be temporary files, duplicate files or data for software you've uninstalled.

Applications Run Slowly

There are several reasons software might be running at turtle speed. You may have computer problems that involve your operating system or an application, your operating system might be missing updates or your computer doesn't have enough hard drive space. If you don't have enough hard drive space, you can scan, clean and optimize your hard drive.

Abnormal Applications Behavior

Computer problems that involve applications acting strangely oftentimes leave you wondering what has happened. Your application has been working just fine, but now, seemingly without reason, it is doing something strange.
For instance, your Word document will no longer show the top margin of your document. It still says it's there, and when you print it, there's not a problem. You just can't see it on your monitor. If this is happening, you may want to restart your computer. Conducting an internet search for the type of problem you're experiencing or consulting your user manual may help you as well.

Using System Repair Software

If you have computer problems, chances are, system repair software can help you fix it. Most of these applications can repair operating system problems that lead to the Blue Screen of Death. They can also replace missing or damaged DLL files. System repair software can also free up space you need for another application, and it can optimize your computer so it runs faster. It may even identify problems you're having with applications, but it depends on the software you use and the application that's having problems.

Wednesday, February 19, 2014

Cool down an overheated laptop(Ways to Fix Your Laptop)

Overheating can rob your laptop of performance and often cause a host of hiccups, such as system crashes and freezing. Every computer generates lots of heat, but laptops are especially susceptible to overheating due to their small size and lack of ventilation. Excessive dust can clog air vents and deprive your system of cold air to cool off the CPU. You can often solve overheating issues simply by cleaning out these air vents with a cloth or keyboard cleaner.
 [Email your tech questions to mjosephtz1@yahoo.com mjosephtz1@gmail.com
Keeping a laptop cool is all about ventilation. If the hot air can't escape, you're going to have a problem.
Whenever your laptop is on, make sure that nothing blocks the vents (which are probably on the sides). Don't put the PC on a pillow or a soft mattress, where it's likely to sink in and get blocked.
And never, ever put your laptop in a bag unless it's off, hybernated, or in sleep mode.
You'll rarely find vents at the bottom of a laptop, yet heat tends to accumulate there. If the bottom is hot to the touch, consider buying a laptop cooler--a pad that goes under the laptop and whisks away the heat. Many of them have fans. Prices range from about $8 to $40.
I'm not going to recommend a particular model because I don't use one. At least for my laptop, an empty but sturdy cardboard box is sufficient.
If you let dust accumulate in a PC, you're bound to have problems. And you'll have to fix those problems with a good cleaning.
Marco Chiappetta described the cleaning process in You're a dirty, dirty, dusty PC. But he used a desktop, and desktop PCs are designed for easy user maintenance.
Laptops are trickier. You can try using a can of compressed air (I bought one recently for $4) to blow the dust away from the vents. But that's a very limited solution. The dust may get away from the vent, but it's still inside the PC.
Try this: Shut down the laptop and turn it over. Examine the bottom. You'll likely find panels that can be removed with a small screwdriver. Open them up and see what you get access to. If you see dust, clean it away with compressed air.


Unfortunately, the real dust problem may be in places that require a more complicated dismantling. If you feel comfortable taking apart a laptop, go ahead. Otherwise, you may want to take it to a professional. 


Or for another alternative you can use this method


Symptom: 
Computer crashes, freezes
Solution: 
Clean out air vents, put filtered material over the inhalation vent, or update BIOS

To prevent further dust buildup, place a piece of filtered cloth, say from a Swiffer, over the inhalation vent. Don't place one over the exhaust vent, as that's where hot air is supposed to flow out of the system quickly. If the cloth doesn't work, you may want to update your system's BIOS, which controls the laptop's hardware. Most manufacturers offer an installation file that updates BIOS files automatically, which often address heat management. Just make sure that your notebook is connected to the power supply when updating the BIOS


Sample text

Sample Text

Sample Text

 
Blogger Templates